Upload test results


The plugin allows you to upload Cypress test results to Xray server or Xray cloud.
Setup
To upload your test results to Xray, make sure you have enabled the results upload in your configuration file:
import { configureXrayPlugin } from "@csvtuda/cypress-xray-plugin";

async setupNodeEvents(on, config) {
    await configureXrayPlugin(on, config, {
        xray: {
            uploadResults: true
        }
    });
}
Afterwards, simply run Cypress:
npx cypress run
Don't forget to provide your authentication credentials.
How it works
The plugin will only upload results for tests you have linked to existing test issues. The plugin will also create a new test execution issue, unless you tell it to reuse a specific test execution issue.
Uploading Cypress test results
The following example consists of three test cases for https://example.org:
- ✅ The first one tries to find an
<h1>element with textExample Domain. - ✅ The second one asserts that the page contains an
<a>element with ahrefattribute. - ❌ The third one tries to find an
<img>element, which does not exist on the page.
When uploading the results, the plugin will create a test execution issue containing the three executed test issues. Since Cypress automatically takes screenshots on failure, the execution will also contain the screenshot as evidence for the failed test case.
A corresponding video can be seen here.
- demo.spec.cy.js
- cypress.config.js
describe("the upload demo", () => {
  beforeEach(() => {
    cy.visit("https://example.org");
  });

  it("CYP-410 Contains a title", () => {
    cy.get("h1").should("contain.text", "Example Domain");
  });

  it("CYP-411 Contains a link", () => {
    cy.get("a").should("have.attr", "href");
  });

  it("CYP-412 Fails a test", () => {
    cy.get("img").should("be.visible");
  });
});
import { configureXrayPlugin } from "@csvtuda/cypress-xray-plugin";

async setupNodeEvents(on, config) {
    await configureXrayPlugin(on, config, {
        jira: {
            projectKey: "CYP",
            url: "https://atlassian.com"
        },
        xray: {
            uploadResults: true
        }
    });
}
Data-driven results
The plugin fully supports data-driven test execution in the following form:
describe("the login page", () => {
  for (const name of ["Jane", "John", "Mary"]) {
    it(`CYP-123 logs in ${name}`, async () => {
      // ...
    });
  }
});
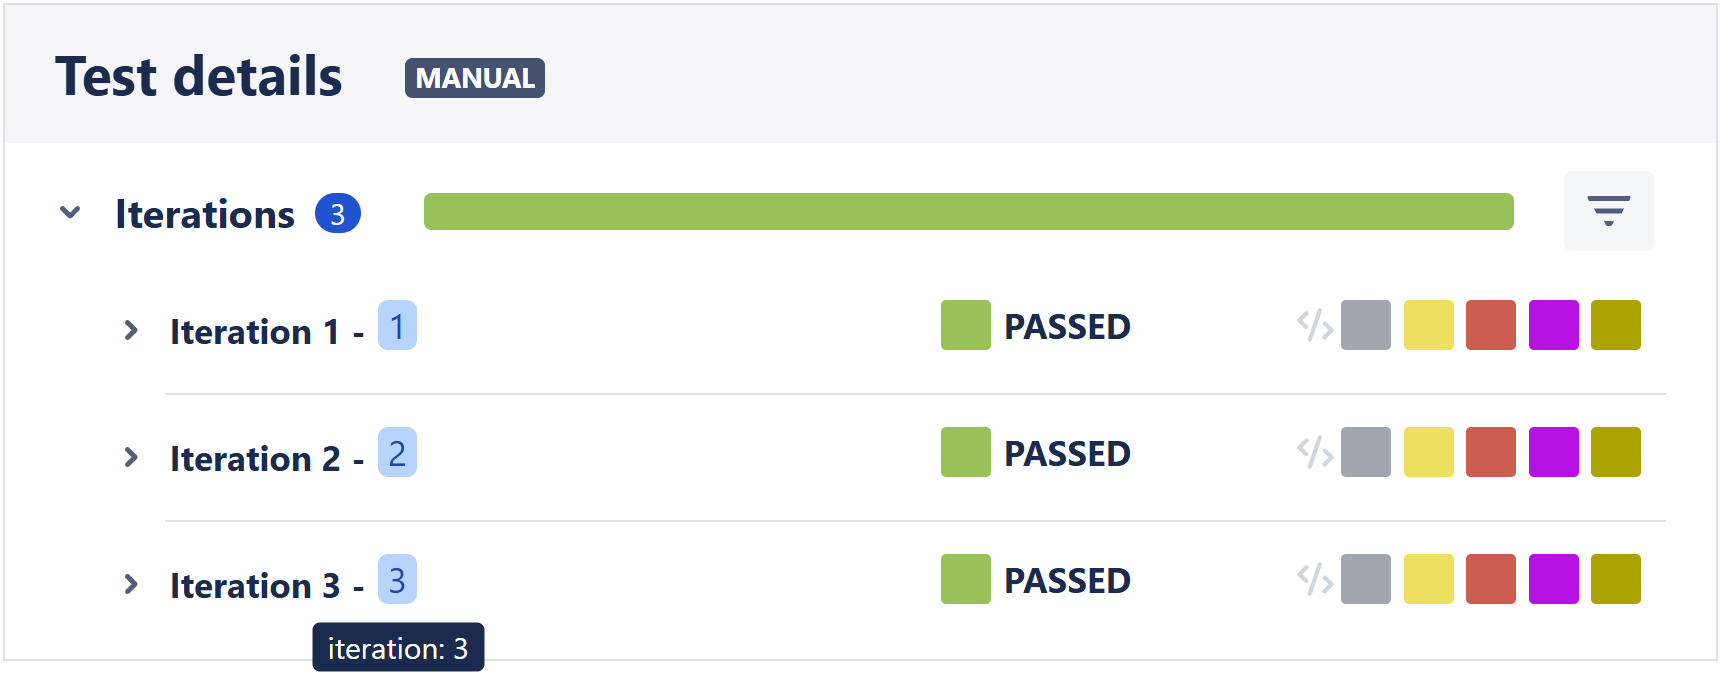
If an issue key is detected in more than one test result, all corresponding test results are mapped to parameterised test results in Xray. By default, the plugin simply adds a single parameter containing the iteration index:
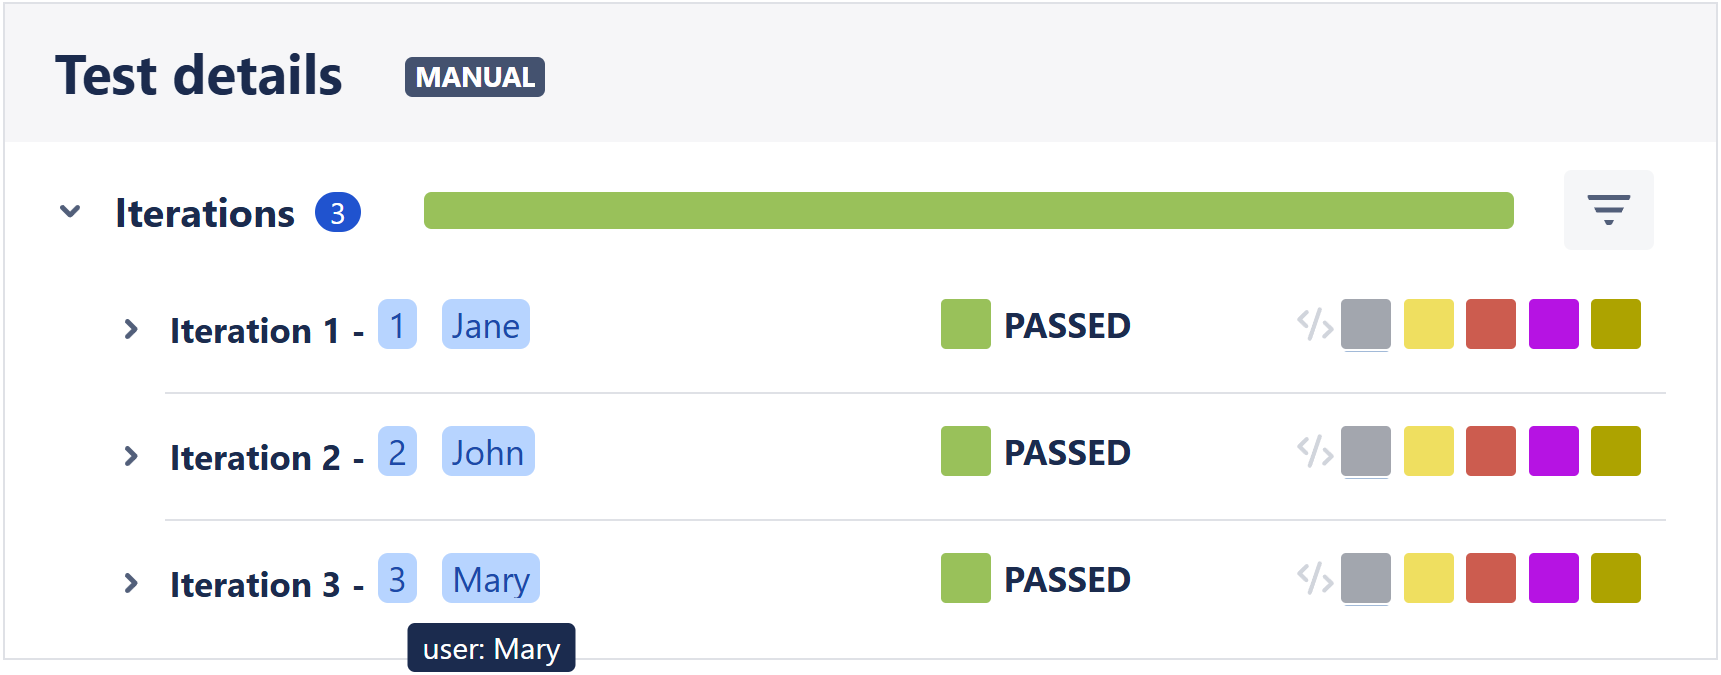
To actually define concrete iteration parameters, a Cypress task can be used:
import {
  enqueueTask,
  PluginTask,
} from "@csvtuda/cypress-xray-plugin/commands/tasks";

describe("the login page", () => {
  for (const name of ["Jane", "John", "Mary"]) {
    it(`CYP-123 logs in ${name}`, async () => {
      // ================================================================= //
      // These three options are all equivalent, so choose your favourite! //
      // ================================================================= //
      cy.task("cypress-xray-plugin:task:iteration:definition", {
        parameters: { user: name },
        test: Cypress.currentTest.titlePath.join(" "),
      });
      enqueueTask("cypress-xray-plugin:task:iteration:definition", {
        user: name,
      });
      enqueueTask(PluginTask.ITERATION_DEFINITION, { user: name });
      // ...
    });
  }
});
Using enqueueTask (with or without PluginTask) allows for type safe task calls.
The parameter values have a maximum allowed length.
On Xray server, the length can be configured by your Xray admins to be anywhere between 64 and 255 (see section Datasets).
On Xray cloud, the maximum allowed length is simply 255.
Uploading Cucumber test results
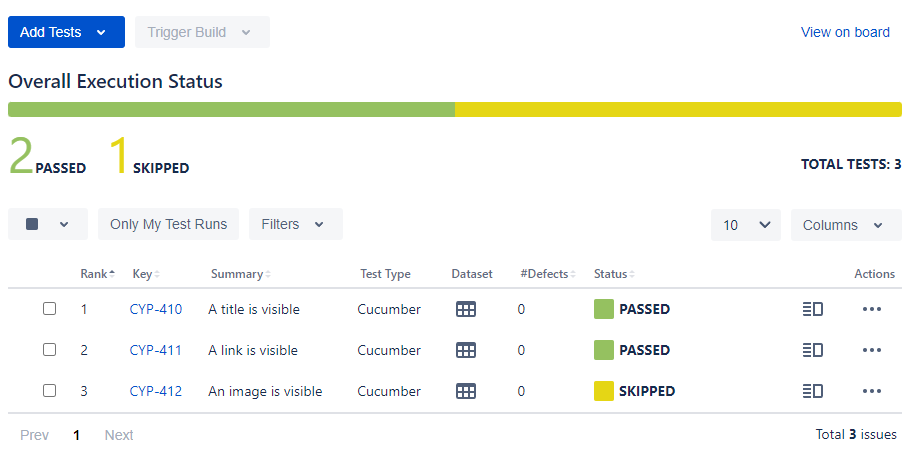
The following example consists of three scenarios for https://example.org, wrapping the tests described above. Since we know that the image test will always fail, we'll mark it as skipped to make use of custom Xray statuses (see here for more information).
The Cucumber preprocessor plugin reports skipped scenarios by marking all the steps they contain as skipped. To mark a Cucumber test as skipped in Xray, you need to specify the respective step status. Xray will then combine the steps' statuses according to your status settings into an overall test status (e.g. if at least one step was skipped, the entire test will be considered skipped).
When uploading the results, the plugin will create a test execution issue containing the three executed scenarios. As the third scenario has been marked as skipped and a custom status has been provided for skipped steps, the entire test for the image verification will also be marked as skipped.
Please read the Cucumber setup guide if you're confused about what's going on below.
- scenarios.feature
- cypress.config.js
- steps.js
Feature: Example page UI tests

    # Each scenario must be tagged with its corresponding
    # Jira test issue key and global Xray tag prefix.
    @TestName:CYP-410
    Scenario: A title is visible
        Given the example page
        Then the title is visible

    @TestName:CYP-411
    Scenario: A link is visible
        Given the example page
        Then the link is visible

    @skip
    @TestName:CYP-412
    Scenario: An image is visible
        Given the example page
        Then an image is visible
import { addCucumberPreprocessorPlugin } from "@badeball/cypress-cucumber-preprocessor";
import createEsbuildPlugin from "@badeball/cypress-cucumber-preprocessor/esbuild";
import createBundler from "@bahmutov/cypress-esbuild-preprocessor";
import { defineConfig } from "cypress";
import fix from "cypress-on-fix";
import { configureXrayPlugin, syncFeatureFile } from "@csvtuda/cypress-xray-plugin";

async setupNodeEvents(on, config) {
    const fixedOn = fix(on);
    await addCucumberPreprocessorPlugin(fixedOn, config);
    await configureXrayPlugin(fixedOn, config, {
        jira: {
            projectKey: "CYP",
        },
        xray: {
            status: {
                step: {
                    skipped: "SKIPPED"
                }
            },
            uploadResults: true
        },
        cucumber: {
            featureFileExtension: ".feature",
            prefixes: {
                test: "TestName:"
            }
        }
    });
    fixedOn("file:preprocessor", async (file) => {
        await syncFeatureFile(file);
        const cucumberPlugin = createBundler({
            plugins: [createEsbuildPlugin(config)],
        });
        return cucumberPlugin(file);
    });
    return config;
}
import { Given, Then } from "@badeball/cypress-cucumber-preprocessor";

Given("the example page", () => {
  cy.visit("https://example.org");
});

Then("the title is visible", () => {
  cy.get("h1").should("contain.text", "Example Domain");
});

Then("the link is visible", () => {
  cy.get("a").should("have.attr", "href");
});

Then("an image is visible", () => {
  cy.get("img").should("be.visible");
});